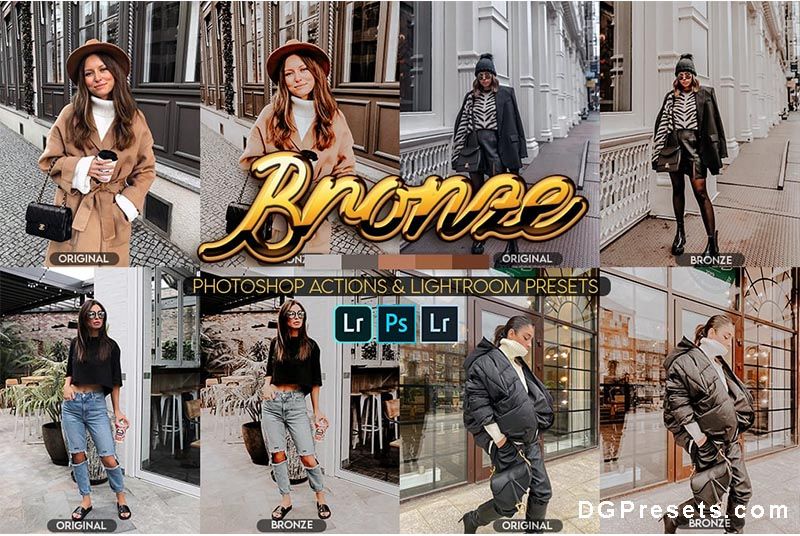
Give your photos a warm, cinematic, and stylish bronze glow with the Bronze Photoshop Actions & Lightroom Presets Free! Designed for photographers, bloggers, and designers, this Lightroom Presets adds deep bronze shadows and rich orange tones, perfect for portraits, fashion, travel, and urban photography.
Why Use Bronze Photoshop Actions & Lightroom Presets?
One-Click Transformation – Instantly apply warm bronze effects.
Editable Effects – Fine-tune the preset for a customized look.
Non-Destructive Workflow – Your original image stays intact.
Universal Preset – Works on all types of images, including RAW & JPEG.
Perfect for Instagram, Blogs, and Commercial Projects.
What’s Included?
ATN (Photoshop Action File) – Automates the bronze color grading in Photoshop.
DNG (Mobile Lightroom Preset) – For editing on Lightroom Mobile (iOS & Android).
XMP (Desktop Lightroom Preset) – Compatible with Lightroom Classic & CC.
ReadMe File – Installation guide for easy setup.
File Format & Benefits
ATN (Photoshop Action File) – Automates color grading for instant results.
DNG (Lightroom Mobile) – Lets you apply the bronze effect directly from your smartphone.
XMP (Lightroom Desktop) – Ensures professional-level editing on Mac & PC.
Compatibility
Adobe Photoshop CC & Higher (Works on CS3 & newer)
Adobe Lightroom 4, 5, 6, 7 & CC
Lightroom Mobile (Free & Premium)
Compatible with Mac & Windows
Works on RAW & JPEG Images
How to Install Bronze Photoshop Actions?
1️⃣ Open Adobe Photoshop.
2️⃣ Go to Window > Actions to open the Actions Panel.
3️⃣ Click the Menu Icon (Top Right Corner) and select Load Actions….
4️⃣ Choose the Bronze ATN File from your downloaded folder.
5️⃣ The action will now appear in the Actions Panel, ready to use.
How to Install Bronze Lightroom Presets?
For Desktop Lightroom (XMP File)
1️⃣ Open Adobe Lightroom Classic CC and go to the Develop Module.
2️⃣ Click on the Presets Panel (Left Side) and then click ‘+’ > Import Presets.
3️⃣ Select the downloaded XMP file and import it.
4️⃣ Your preset is now ready to use!
For Lightroom Mobile (DNG File)
1️⃣ Unzip the download and save the DNG file on your phone.
2️⃣ Open Lightroom Mobile and import the DNG file as a new image.
3️⃣ Tap on the imported image, go to Presets > Create Preset, and Save.
4️⃣ Apply the preset to any photo with one tap!
Before & After Preview
Why Download from DGPresets.com?
- Completely Free – No hidden costs, just premium-quality presets.
- Commercial Use Allowed – Use for professional & personal projects.
- Direct Download Links – No waiting, no passwords, just instant access.
- Before & After Previews – See the stunning transformation before applying.

Want more free presets & actions? Visit DGPresets.com for unlimited downloads!