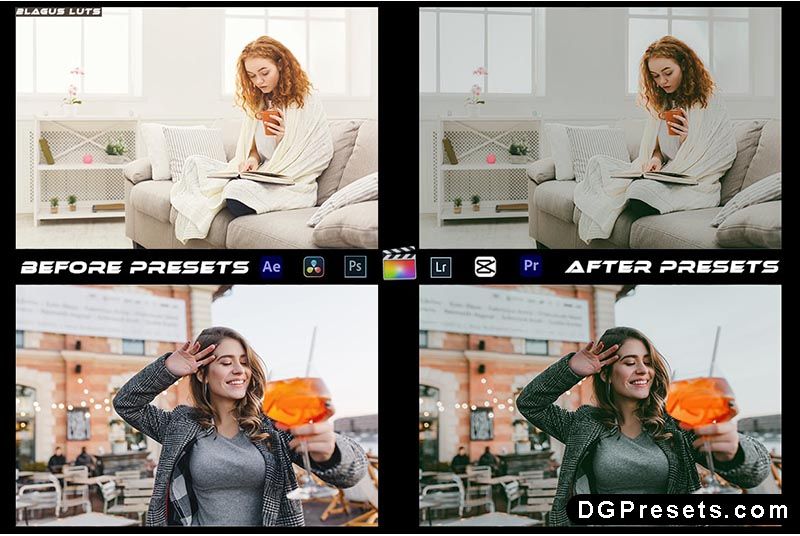
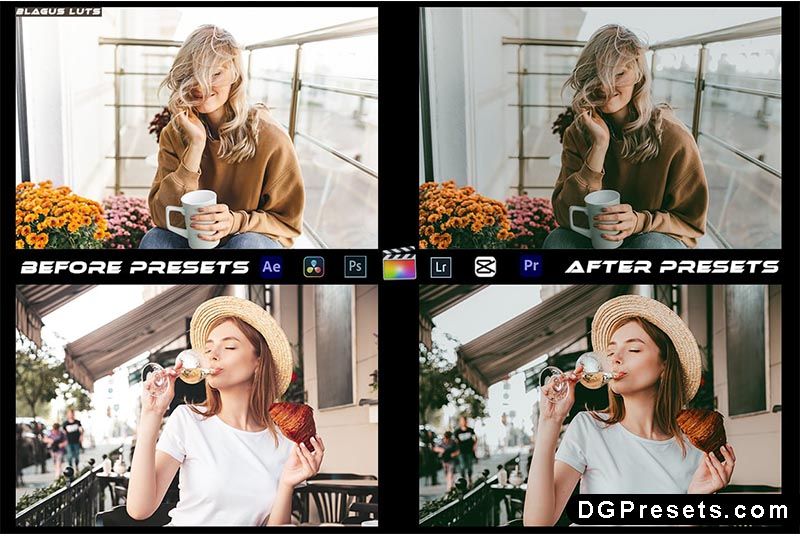
Enhance your videos and photos with the Warm Portrait Presets and LUTs Free Download for Video and Photo Editing, designed to bring a rich, cinematic warmth and natural skin tones to your content. Perfect for filmmakers, photographers, and content creators, this Lightroom Presets pack is ideal for portraits, travel, lifestyle, and vlog editing. You Can Also Download Free Photoshop Overlays
Why Use These Presets & LUTs?
Cinematic Warm Tones – Adds a rich, golden warmth for a professional film look.
One-Click Editing – Quickly transform videos & photos with high-quality filters.
Works with Popular Editing Software – Compatible with Premiere Pro, Final Cut Pro, DaVinci Resolve, After Effects, and more.
Perfect for Video & Photography – Ideal for weddings, portraits, travel, and cinematic projects.
Works on Mobile & Desktop – Use it on Lightroom, Photoshop (Camera Raw), and mobile devices.
What’s Included?
LUTs (.CUBE) for Video Editing – Works with Premiere Pro, Final Cut Pro, DaVinci Resolve, and more.
Lightroom Mobile Presets (.DNG) – Edit on the go with Lightroom Mobile.
Lightroom Desktop Presets (.XMP) – For Lightroom Classic & CC.
Photoshop Camera Raw Presets (.XMP) – Works with Adobe Photoshop’s Camera Raw Filter.
Step-by-Step Installation Guide – Easy setup instructions included.
How to Install & Use the Presets & LUTs?
For Premiere Pro & Video Editing Software (LUTs – .CUBE Format)
1️⃣ Open your video editing software (Premiere Pro, Final Cut Pro, DaVinci Resolve, etc.).
2️⃣ Import your video and go to the Color Grading Panel.
3️⃣ Load a LUT (.CUBE file) by selecting “Apply LUT” in the color settings.
4️⃣ Adjust intensity for the perfect look.
For Lightroom Mobile (.DNG Presets)
1️⃣ Download and unzip the file, then transfer the .DNG files to your phone.
2️⃣ Open Lightroom Mobile and import the DNG files as images.
3️⃣ Select a DNG image, tap three dots (⋮), and choose Copy Settings.
4️⃣ Open your photo, tap three dots (⋮) again, and choose Paste Settings.
For Lightroom Desktop (.XMP Presets)
1️⃣ Open Adobe Lightroom Classic CC and go to the Develop Module.
2️⃣ On the left panel, find the Presets Panel, click the “+” icon, and select Import Presets.
3️⃣ Choose the .XMP files and import them.
4️⃣ Restart Lightroom, and you’re ready to use the presets!
For Photoshop Camera Raw (.XMP Presets)
1️⃣ Open Photoshop, then go to Camera Raw Filter.
2️⃣ Click the Presets Panel and select Import Profiles & Presets.
3️⃣ Choose the .XMP preset files and import them.
4️⃣ Apply the preset and adjust settings if needed.
Pro Tips for Best Results
Use high-resolution images and videos for better quality.
Adjust exposure and white balance to fine-tune the effect.
Ideal for warm, golden-hour portrait shots, travel vlogs, and cinematic projects.
Before & After Preview


Why Download from DGPresets.com?
- Completely Free – No hidden fees, just professional-quality presets & LUTs.
- Commercial Use Allowed – Use these for personal and professional projects.
- Direct Download Links – Instant access, no waiting.
- Before & After Previews – See the transformation before applying.
Download Free
Want more free Photoshop actions & presets? Visit DGPresets.com for unlimited downloads!


